Artificial grass, or synthetic turf, is a popular, low-maintenance alternative to natural grass. Made from durable synthetic fibers, it offers a lush, green appearance year-round, regardless of weather. Ideal for homes with kids or pets, artificial grass saves time, water, and money on maintenance while supporting an eco-friendly lifestyle. This beginner’s guide will help you install artificial grass yourself, whether you're upgrading your backyard, creating a play area, or building a pet-friendly zone, ensuring professional-looking results.
Understanding the Different Types of Artificial Grass
When selecting artificial grass for your project, it's essential to understand the different types available, as each type is designed for specific applications and conditions. Two common types of artificial grass are Artificial Turf and Artificial Grass with Drain Cell. Each offers unique benefits, depending on your needs.
1. Artificial Turf
Artificial turf is a versatile and durable option, often used in residential lawns, playgrounds, and sports fields. It's made from synthetic fibers that mimic the appearance of natural grass, offering a lush, green look throughout the year. Artificial turf is designed to withstand heavy foot traffic and extreme weather conditions, making it ideal for areas where durability and resilience are key.
- Applications: Residential lawns, sports fields, playgrounds.
- Benefits: Low maintenance, weather-resistant, durable, suitable for high-traffic areas.
Considerations: Proper installation and infill are necessary to maintain its appearance and longevity.

2. Artificial Grass with Drain Cell
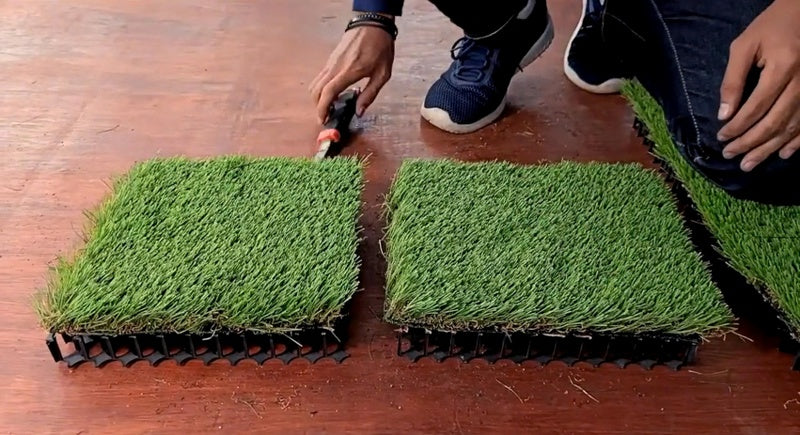
Artificial grass with drain cells is specifically designed for areas where efficient drainage is crucial. The drain cell is a layer installed beneath the artificial grass, providing a high drainage capacity that allows water to flow through and prevent pooling. This type of grass is ideal for areas prone to heavy rainfall or for installations on rooftops, balconies, and other surfaces where drainage is a concern.
- Applications: Rooftops, balconies, areas with poor drainage.
- Benefits: Excellent drainage, prevents water pooling, suitable for areas with heavy rainfall.
Considerations: Requires a well-prepared base to ensure effective drainage and stability.

Choosing the Right Type for Your Project
When deciding between artificial turf and artificial grass with drain cell, consider the specific needs of your space. If your area is exposed to heavy foot traffic and extreme weather, artificial turf is a reliable option. On the other hand, if you're installing grass in a space where drainage is critical, such as a rooftop garden or a rain-prone area, artificial grass on drain cell will ensure your lawn remains dry and functional.
By selecting the appropriate type of artificial grass, you can ensure that your installation not only looks great but also performs well in the long term. Whether you need the robust durability of artificial turf or the efficient drainage of artificial grass on drain cell, Konzept Garden offers high-quality solutions to meet your landscaping needs.
Now that you have a better understanding of the different types of artificial grass, this guide will walk you through the process of installing artificial turf with professional results.
Getting Started: Tools and Materials Needed
Starting a new project requires the right tools and materials, and installing artificial grass is no exception. Having the proper equipment on hand will not only make the process smoother but also ensure that your installation is durable and professional-looking. In this section, we will cover all the essential tools and materials you’ll need to get started, allowing you to plan ahead and gather everything necessary before you begin.
Essential Tools
- Measuring Tape: Accurate measurements are crucial for ordering the correct amount of artificial grass and ensuring a precise fit. A good-quality measuring tape will help you measure the length and width of your area accurately, accounting for any curves or irregularities.
- Utility Knife: A sharp utility knife is necessary for cutting the artificial grass to fit your installation area. It’s important to use a new, sharp blade to achieve clean, precise cuts, especially around edges and obstacles.
- Rake: Before laying down the artificial grass, you’ll need to ensure that the base is smooth and free of debris. A rake is the ideal tool for leveling the base material and removing any stones, roots, or other debris that could interfere with the installation.
- Shovel: A shovel is essential for digging and leveling the ground before installing the grass. You’ll use it to remove the top layer of soil, create a level surface, and spread the base material.
- Hammer and Nails: To secure the edges of the artificial grass, you’ll need a hammer and galvanized nails or landscaping staples. These will anchor the grass to the ground, preventing it from shifting and ensuring a tight, secure fit.
- Power Broom or Stiff Brush: After the grass is installed, a power broom or stiff brush is used to lift the grass fibers and evenly distribute the infill material. This final step is crucial for achieving a natural look and feel, as well as ensuring the grass blades remain upright.
Materials Required
- Artificial Grass Rolls: The artificial grass itself is the most important material for your project. Choose a high-quality grass that suits your needs, whether it’s for a backyard, play area, or pet zone. Make sure to order enough grass to cover your entire area, with some extra to account for cutting and fitting. If you’re looking for reliable options, consider suppliers of artificial grass, known for their durability and realistic appearance. Konzept Garden's artificial grass is designed to meet the highest standards of quality. Our premium grass rolls come in various shades and pile heights, allowing you to choose the perfect match for your landscape.
- Weed Barrier Fabric: Laying down a weed barrier fabric is a critical step in preventing weeds from growing through your artificial grass. This fabric is placed directly on the ground before the base material is added, creating a barrier that blocks weed growth.
- Sand or Gravel Base Material: A stable base is essential for a smooth, level artificial lawn. Sand or gravel provides a solid foundation that helps with drainage and prevents the grass from sagging or developing low spots. You’ll need enough base material to cover the area to a depth of about 2-3 inches.
- Adhesive or Turf Tape: To secure seams between pieces of artificial grass, you’ll need adhesive or turf tape. This material is applied along the seams to bond the grass pieces together, creating a seamless appearance. Choose a high-quality adhesive designed specifically for artificial grass installation.
- Stakes or Pins: Stakes or pins are used to anchor the edges of the artificial grass securely to the ground. These are typically placed every few inches along the perimeter of the grass to keep it in place and prevent any movement.
- Infill Material (Sand or Rubber): Infill is an essential component of artificial grass installation. It helps to weigh down the grass, keep the blades upright, and provide a cushioning effect, making the grass feel more natural underfoot. The type of infill you choose—sand, rubber, or a combination—will depend on your specific needs, such as play areas or pet-friendly spaces. Konzept Garden offer premium infill materials such as silica sand and rubber granules, which are essential for keeping your artificial grass blades upright and providing a soft, cushioned feel underfoot.
Step-by-Step Guide to Artificial Grass Installation
Preparation Steps
Before laying down your artificial grass, it’s crucial to properly prepare the area. A well-prepared base ensures that your artificial lawn will be smooth, level, and long-lasting. This section will guide you through the necessary steps to measure, clear, and prepare your installation site, setting the stage for a successful project.
Measuring the Area
Accurate measurements are the foundation of a successful artificial grass installation. Properly measuring your area ensures that you order the right amount of materials and helps avoid unnecessary cuts or waste.
- How to Measure the Installation Area Accurately:
- Start by measuring the length and width of the area where the artificial grass will be installed. Use a measuring tape to capture these dimensions precisely, taking care to measure from edge to edge.
- If your installation area is a perfect rectangle or square, calculating the total area is straightforward—just multiply the length by the width. However, many lawns and gardens have irregular shapes, so you may need to break the area into smaller, more manageable sections.
- Tips for Accounting for Curves and Irregular Shapes:
- For areas with curves or irregular borders, divide the space into smaller geometric shapes such as rectangles, triangles, or circles. Measure each section separately, then add up the individual areas to get the total square footage.
- Always add an additional 10-15% to your total area to account for any cutting, fitting, or unexpected adjustments. This extra material will help ensure you have enough grass to cover the entire space without running short.
Clearing the Area
A clean, debris-free surface is essential for laying artificial grass. Removing any existing vegetation, rocks, and debris will create a smooth foundation for your new lawn.
- Removing Existing Grass, Rocks, and Debris:
- Begin by removing any existing grass, weeds, rocks, or other debris from the area. This can be done manually with a shovel, rake, or hoe, or you can use a sod cutter for larger areas.
- It’s important to remove all vegetation down to the roots to prevent regrowth beneath your artificial grass. Consider using a weed killer a few weeks before installation to ensure all plant life is eradicated.
- Ensuring the Ground is Free from Weeds and Roots:
- After clearing the area, thoroughly inspect the ground for any remaining weeds, roots, or other obstacles. Any roots or stumps that are left behind could eventually grow through the artificial grass, so it’s important to remove them completely.
- Once the ground is clear, use a rake to level the surface, removing any bumps or hollows that could affect the installation.

Preparing the Base
A stable and well-compacted base is crucial for the longevity and appearance of your artificial lawn. The base layer will provide a smooth, even surface for the grass and ensure proper drainage.
- Laying a Weed Barrier:
- Before adding any base material, lay down a weed barrier fabric over the entire area. This fabric prevents weeds from growing through the artificial grass, which could cause unsightly bumps or damage the grass.
- Overlap the edges of the weed barrier by a few inches to ensure complete coverage, and secure the fabric to the ground with stakes or pins.
- Creating a Stable Base Using Sand or Gravel:
- Once the weed barrier is in place, you can start building the base. Spread a layer of crushed stone, gravel, or sand over the area to a depth of 2-3 inches. The base material will help with drainage and provide a firm foundation for the grass.
- Use a rake to evenly distribute the base material across the entire area. For best results, aim for a slight slope away from any buildings or structures to facilitate drainage.
- Compacting the Base for a Smooth Surface:
- After spreading the base material, it’s time to compact it. Use a plate compactor, hand tamper, or roller to firmly compact the base, ensuring that it is smooth, level, and free from loose particles.
- Compacting the base properly will prevent the artificial grass from settling unevenly over time, which could lead to bumps or depressions in the surface. Take your time to compact the entire area thoroughly, and check for any low spots that may need additional material and further compaction.
With the area measured, cleared, and the base prepared, you’re now ready to move on to the exciting part—laying the artificial grass and bringing your new lawn to life!
Laying the Artificial Grass
With your area properly prepared, you’re ready to start laying the artificial grass. This is where your project starts to take shape, as you transform your outdoor space into a lush, green haven. In this section, we will walk you through the steps of unrolling, cutting, and securing your artificial grass to ensure a perfect fit and professional finish.
Unrolling the Grass
- How to Unroll and Position the Grass: Begin by unrolling the artificial grass over the prepared base. Take your time to position it correctly, ensuring that the grass blades are all facing the same direction for a uniform appearance.
- Tips for Aligning the Grass Correctly: Align the edges of the grass with the perimeter of your installation area. If you need to join multiple pieces, make sure the seams are tight and the blades are oriented in the same direction.
Cutting and Fitting
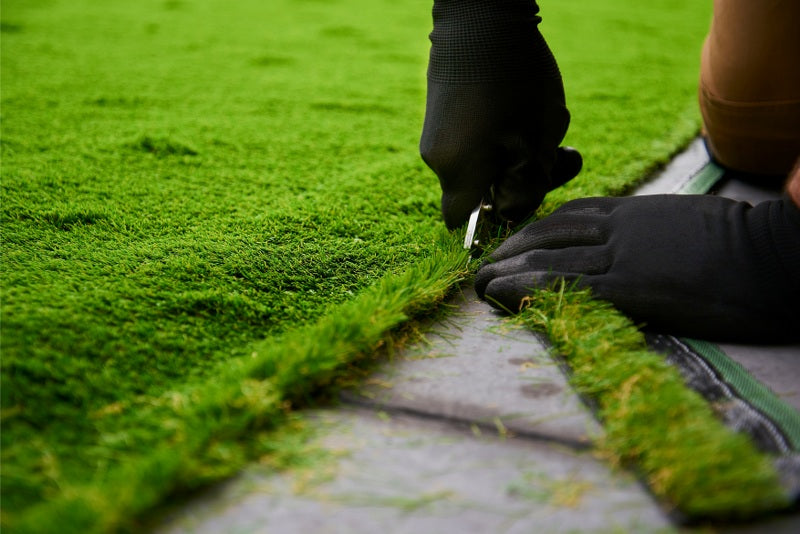
- Techniques for Cutting the Grass to Fit the Area: Use a sharp utility knife to carefully trim the grass to the shape of your area. Cut slowly and precisely to avoid any mistakes.
- Ensuring a Seamless Look at the Edges and Around Obstacles: For a seamless appearance, take extra care when cutting around edges, pathways, or obstacles. Use adhesive or turf tape to secure any seams between different pieces of grass.

Securing the Grass
- How to Secure the Edges Using Nails or Staples: Secure the edges of the grass by nailing or stapling it down every few inches. This will prevent the grass from shifting and help it lay flat.
- Using Adhesive or Turf Tape for Seams: Apply adhesive or turf tape to any seams between pieces of grass. Press the seams together firmly to ensure a tight bond and a seamless look.
Adding Infill and Finishing Touches
Now that your artificial grass is in place, the final step is to add infill and make any finishing touches. Infill is crucial for the longevity and appearance of your grass, as it helps the blades stay upright and provides cushioning. This section will guide you through selecting and applying infill, as well as brushing the grass for a polished, natural look.
Choosing the Right Infill
- Types of Infill Materials (Sand, Rubber, etc.): There are various types of infill materials available, such as sand and rubber. Each type has its advantages, depending on the intended use of your artificial lawn.
- Importance of Infill in Maintaining the Grass Structure: Infill helps weigh down the grass, keeping it in place and preventing the blades from matting. It also provides a softer feel underfoot, mimicking natural grass.
Spreading the Infill
Spread the infill evenly across the grass using a drop spreader or by hand. After spreading, use a power broom or stiff brush to work the infill into the grass fibers and ensure it is distributed evenly.
Brushing the Grass
- Using a Power Broom or Stiff Brush to Lift the Grass Fibers: Brushing the grass after installing infill will help lift the blades and give the grass a natural, upright appearance.
- Final Touches for a Natural Look: Inspect your installation for any uneven spots or areas that need more infill. Make any necessary adjustments to ensure your artificial lawn looks flawless and natural.
Troubleshooting Common Problems
Even with careful planning and execution, you may encounter a few challenges during or after your artificial grass installation. Fortunately, most issues are easy to fix with a little troubleshooting. This section covers common problems and their solutions to help you maintain a flawless artificial lawn.
- Issues with Installation: If you notice any uneven areas or visible seams, you can re-adjust the grass or add more infill to level out the surface.
- Dealing with Drainage Problems: If water pools on your artificial lawn, it may indicate an issue with the base. You might need to improve the drainage by adding more base material or adjusting the slope.
- Preventing Weed Growth: Ensure that the weed barrier is intact and effective. Occasionally inspect the edges and seams of your lawn for any signs of weeds and address them promptly.
Maintenance Tips from Konzept Garden
Even though artificial grass requires much less maintenance than natural grass, a little care goes a long way in keeping it looking fresh and vibrant. Regular cleaning and occasional upkeep will help your artificial lawn retain its beauty and longevity. In this section, we’ll share some essential maintenance tips to ensure your grass stays in top condition year-round.
- Regular Cleaning: Regularly remove leaves, dirt, and debris from your artificial grass using a leaf blower or a stiff brush. Rinse the grass occasionally with water to keep it clean.
- Preventing and Handling Damage: Avoid placing hot objects on the grass, and be cautious with sharp objects that could tear the surface. For minor burns or tears, repair kits are available to fix the damage.
- Seasonal Care: In the winter, brush away any snow or ice buildup. During dry seasons, rinse the grass occasionally to remove dust and keep it looking fresh.
For added longevity, Konzept Garden offers maintenance kits that include everything you need to address common issues like minor tears or wear spots.
Why Choose Konzept Garden for Your Artificial Grass Installation?
When it comes to enhancing your landscape, the quality of materials makes all the difference. Konzept Garden offers a diverse range of artificial grass options designed to meet various needs—from pet-friendly zones to elegant garden spaces. Our products are engineered to withstand the elements, ensuring that your lawn stays green and inviting, no matter the season.
Our artificial grass features:
- Realistic Texture and Color: Meticulously crafted to replicate the look and feel of natural grass, our products add an authentic touch to any outdoor area.
- Durability: Resistant to UV rays, heavy foot traffic, and harsh weather, our artificial grass is built to last, maintaining its appearance and performance over time.
- Eco-Friendly Solutions: By choosing artificial grass, you’re contributing to water conservation and reducing the need for chemical treatments—an ideal choice for eco-conscious homeowners.

Customized Artificial Grass Installation Services from Konzept Garden
For those who prefer a hassle-free experience, Konzept Garden also offers professional Artificial Grass installation services. Our team of experts handles every aspect of the installation, from site preparation to the final touches, ensuring that your new lawn is perfectly installed and ready to enjoy. We use the latest techniques and tools to achieve seamless results that blend naturally with your existing landscape.
Conclusion
Installing artificial grass can be a rewarding DIY project, but the right products and guidance make all the difference. With Konzept Garden’s high-quality materials and expert support, you can achieve a stunning, low-maintenance lawn that enhances your outdoor space for years to come. Whether you're tackling the project yourself or opting for our professional installation services, Konzept Garden is here to help you every step of the way.
Sincerely,
Konzept Garden Team
